A step by step guide on how to use Google autocomplete in react with hooks!
If you haven’t already checked out the JavaScript Google Place API docs, they can be a little confusing, especially when using the code with react hooks.
You can find the docs for the Google Places Autocomplete Service here, and will be useful to reference along with this article!
In this article we are going to go through, step by step, of how we can make use of the Google Places Autocomplete Service in both JavaScript, React, and React hooks.

We will finish off by making an effective, efficient react hook for the Google Places Autocomplete Service.
This will provide us with a way in which we can get react address autocomplete predictions in real time based on what the user is typing
The Places Service is part of the Google Maps API and goes hand in hand with Google Maps and can easily be integrated to make a react Google Maps Autocomplete - but that is a whole other post!
If you want to skip directly to the hook, or if you just want the code, you can jump to the bottom of this article or install the hook directly via the usePlacesAutocomplete npm module.
Let’s get started.
Getting to know the JavaScript Places API
You will need to get an API key from Google to be able to use this service, you can create one here.
Firstly, towards the top of Google’s documentation you will find AutocompleteService class followed by the class google.maps.places.AutocompleteService.
This code block/string is telling you how to find and use this service!
As you might have guessed, we don’t have a google module installed, and we won’t be installing one either, instead we need to reference the script in our html to be able to use the Places API.
You can do so by adding the following script in the <head> of your html.
<script
  type="text/javascript"
  src="//maps.googleapis.com/maps/api/js?key=YOUR_API_KEY_GOES_HERE&language=en&libraries=places"
></script>
This script is allowing English to be used by the query parameter &language=en as well as telling Google that we want to use the Places API/Library by adding &libraries=places.
Now we have that installed, we need to choose whether we want to use getPlacePredictions or getQueryPredictions.
To keep things simple in this article, we will stick with getPlacePredictions with AutocompletionRequest and AutocompletePrediction to find addresses.
However, both are pretty similar and you will probably be able to follow these steps equally for either.
Making a function to call the Google Autocomplete Service
If you use the Google Places Autocomplete Service you need to know and understand the requirements from Google first:
- You can use Place Autocomplete even without a map.
- If you do show a map, it must be a Google map.
- When you display predictions from the Place Autocomplete service without a map, you must include the “Powered by Google” logo.
Read more about this here on the Google Docs
Here is how our code will look after implementing the Places Autocomplete Service:
export const googleAutocomplete = async text =>
  new Promise((resolve, reject) => {
    if (!text) {
      return reject("Need valid text input")
    }

    // for use in things like GatsbyJS where the html is generated first
    if (typeof window === "undefined") {
      return reject("Need valid window object")
    }

    try {
      new window.google.maps.places.AutocompleteService().getPlacePredictions(
        { input: text, componentRestrictions: { country: "gb" } },
        resolve
      )
    } catch (e) {
      reject(e)
    }
  })
The first thing you might notice is that we are using an explicit promise to handle the call to the service.
That is because the service uses a callback and does not return anything, this means that if we want to use it as an asynchronous function, we need to create that functionality ourselves.
Next you will see we have wrapped the service call in a try catch block, in general it is always worth wrapping any async calls in a try catch block because they can and will fail occasionally and it is better to handle them than to not.
Now we get onto the part where we actually call the Google Places Autocomplete Service in JavaScript.
The following new window.google.maps.places.AutocompleteService().getPlacePredictions(options, callback) will be doing all the hard work here.
The options we are providing include the regional restrictions that we want to include, so if you have a requirement to ensure you only show results in a certain country you can do it by passing in the correct ISO 3166-1 Alpha-2 country code. You can find a full list of country codes here.
We are also providing our user provided text search to the autocomplete for our predictions!
You can see the full list of options/arguments here on the AutocompletionRequest interface
Finally, we are providing our resolve function to the callback so that when the callback is called, it will resolve our promise and return the relevant results to us.
And there we have our basic autocomplete function.
The next thing to do is to start using it in React!
Using the Google Places Autocomplete function in React
We have quite a few different options here depending on how we want to use it.
To keep things simple we will only go over two popular use cases. On form submission On input change (we will use hooks for this one!)
Let’s start with the form submission code:
import React, { useState } from "react"
// the function we just created
import { googleAutocomplete } from "./google-autocomplete"

export default function PredictionsOnFormSubmission() {
  const [searchValue, setSearchValue] = useState("")
  const [predictions, setPredictions] = useState([])

  const handleSubmit = async e => {
    e.preventDefault()
    const results = await googleAutocomplete(searchValue)
    if (results) {
      setPredictions(results)
    }
  }

  return (
    <>
      <form onSubmit={handleSubmit}>
        <input
          name="predictionSearch"
          value={searchValue}
          onChange={e => setSearchValue(e.target.value)}
        />
        <button type="submit">Search</button>
      </form>
      <img
        src="https://developers.google.com/maps/documentation/images/powered_by_google_on_white.png"
        alt="Powered by Google"
      />
      {predictions?.map(prediction => (
        <p key={prediction?.place_id}>
          {prediction?.structured_formatting?.main_text || "Not found"}
        </p>
      ))}
    </>
  )
}
We are using a controlled input element to get the user query.
We then send this to Google after the form has been submitted.
When we get the results we then update our predictions state, which will then cause our component to rerender and display the new predictions.
Using the Google Places Autocomplete Service as a react hook!
Okay now onto the final step, and the part you have most likely been waiting for, creating a react hook to get predictions in real time as the user types!
Let’s start by looking at how we want to use the hook:
import React, { useState } from "react"
// the hook we will create
import usePlacesAutocomplete from "./use-places-autocomplete"

export default function PredictionsOnInputChange() {
  const [selectedPrediction, setSelectedPrediction] = useState(null)
  const [searchValue, setSearchValue] = useState("")
  const predictions = usePlacesAutocomplete(searchValue)

  const handlePredictionSelection = (e, prediction) => {
    e.preventDefault()
    setSelectedPrediction(prediction)
  }

  return (
    <>
      <form>
        <input
          name="predictionSearch"
          value={searchValue}
          onChange={e => setSearchValue(e.target.value)}
        />
        <img
          src="https://developers.google.com/maps/documentation/images/powered_by_google_on_white.png"
          alt="Powered by Google"
        />
        <ul>
          {predictions?.map(prediction => (
            <li key={prediction?.place_id}>
              <button
                onClick={e => handlePredictionSelection(e, prediction)}
                onKeyDown={e => handlePredictionSelection(e, prediction)}
              >
                {prediction?.structured_formatting?.main_text || "Not found"}
              </button>
            </li>
          ))}
        </ul>
        <h3>You searched for: {searchValue}</h3>
        <h3>
          You selected:{" "}
          {selectedPrediction?.structured_formatting?.main_text || "None"}
        </h3>
      </form>
    </>
  )
}
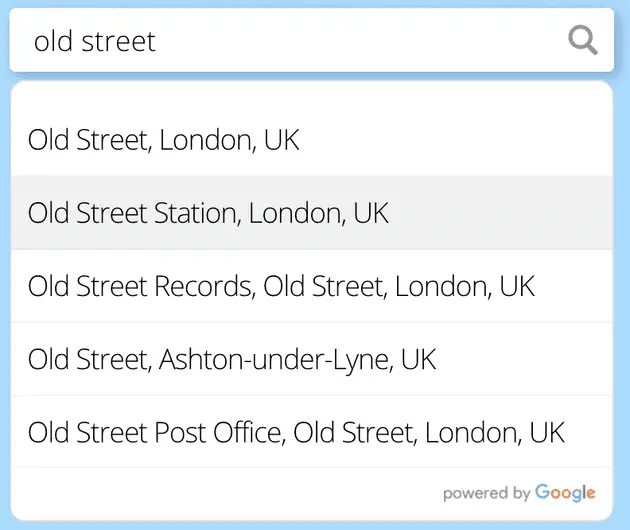
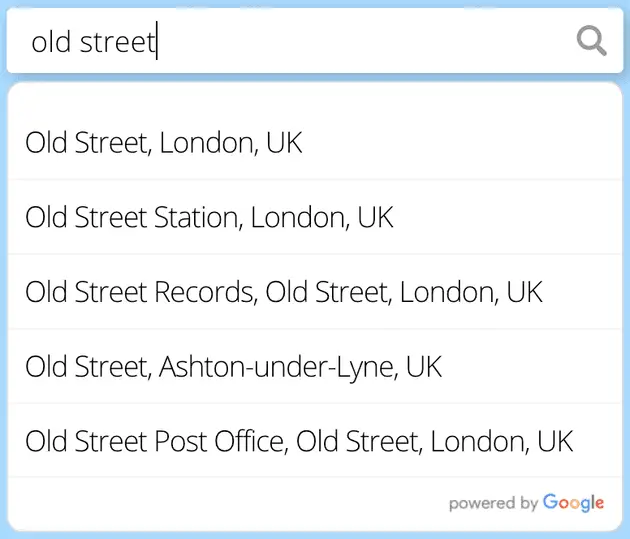
After you add styles and customize the code a little you will end up with something that looks like the following:
The predictions list after typing a place into the input:

Selecting the prediction you want:

To keep our hook flexible, in the above code we are using the hook by providing it with our input state value which it can then use to get new predictions every time the state variable changes.
When the user types it will then update the list of predictions below that the user can then select from.
This usage will provide a flexible use of the Google Autocomplete service whilst removing as much confusion as possible by providing a simple, easy to use function.
This does present a problem though, we don’t necessarily want to make a new request every time the user presses a new key.
Making a new request on every keypress is wasteful, expensive and less efficient.
We can fix this issue by doing something called debouncing which we will include in our react hook.
All debouncing means is that we will effectively wait for the user to stop typing before making a new call.
We do this by only running a function if it has not been called within a certain timeframe.
Let’s dive in and see how our react hook will look:
import { useState, useEffect } from "react"
// the function we just created
import { googleAutocomplete } from "./google-autocomplete"

export function usePlacesAutocomplete(text = "", debounceTimeout = 400) {
  const [predictions, setPredictions] = useState([])

  useEffect(() => {
    const handleDebounce = setTimeout(async () => {
      try {
        if (!text) {
          return
        }

        const nextPredictions = await googleAutocomplete(text)
        setPredictions(nextPredictions)
      } catch (e) {
        console.error(e)
      }
    }, debounceTimeout)

    return () => {
      clearTimeout(handleDebounce)
    }
  }, [text, debounceTimeout])

  return predictions
}
For the most part this is using the same principles as our form submission example, but now it is combined into a single google autocomplete react hook for ease of use which includes debouncing.
We are handling the debouncing by using the useEffect cleanup function with a setTimeout.
When this function gets called, it will set a new timeout which will execute in 0.4 seconds and call the google autocomplete service.
If the function gets called again before the 0.4 seconds, the timeout will be cancelled and a new one will be created.
The cleanup function gets run before every render which is how we remove the timeout.
This is a rough idea of the steps at work here:
- User types
- Causes rerender by setting the input state
- Causes timeout to start in the usePlacesAutocomplete hook
- User types next key
- Cleanup function gets run and cancels the timeout along with the service call.
- This process now repeats until the user stops typing.
When it comes to implementing/using this hook, I strongly recommend you use the usePlacesAutocomplete npm module that I have created here to save you time and effort.
There we have the complete implementation, from start to finish of Google’s Place Autocomplete Service in JavaScript, React and React hooks.
It is worth mentioning our google autocomplete react hook will also work with react native google places, you just need to replace the html elements with your native elements and the API import, but the principles of the hook will be the same.
To directly use the hook as an npm module you can find it here, usePlacesAutocomplete
To view all the code of this article, you can see it in this gist.
I hope this has helped!
Will


